I sometimes feel a little bit like an author whose agent or publisher is pushing him for the next chapter. But the lure of the sun (we are getting plenty here in Pembrokeshire) and the daily changes brought on by spring and early summer are all too much for me and I leave the desk in preference to getting out and living life. I would always prefer to be outside wandering through the hills or exploring another part of the wonderful 186 mile long Pembrokeshire Coastal Path with a map, a rucksack full of food in company with my lovely wife.
Anyhow enough of that, I need to blog!! Over time I want to give you an idea of the range of skills you should try to master in order to become safe and competent in the hills and moorlands of the UK. A few days ago I jumped into the reasons why you should carry ‘spares and repair’ which is only one item in your rucksack and today I thought I would run through a few useful tips and techniques for getting around any walk with competence. There is no one definitive Top Ten: it is all about whatever you think is most useful so here is my top ten:
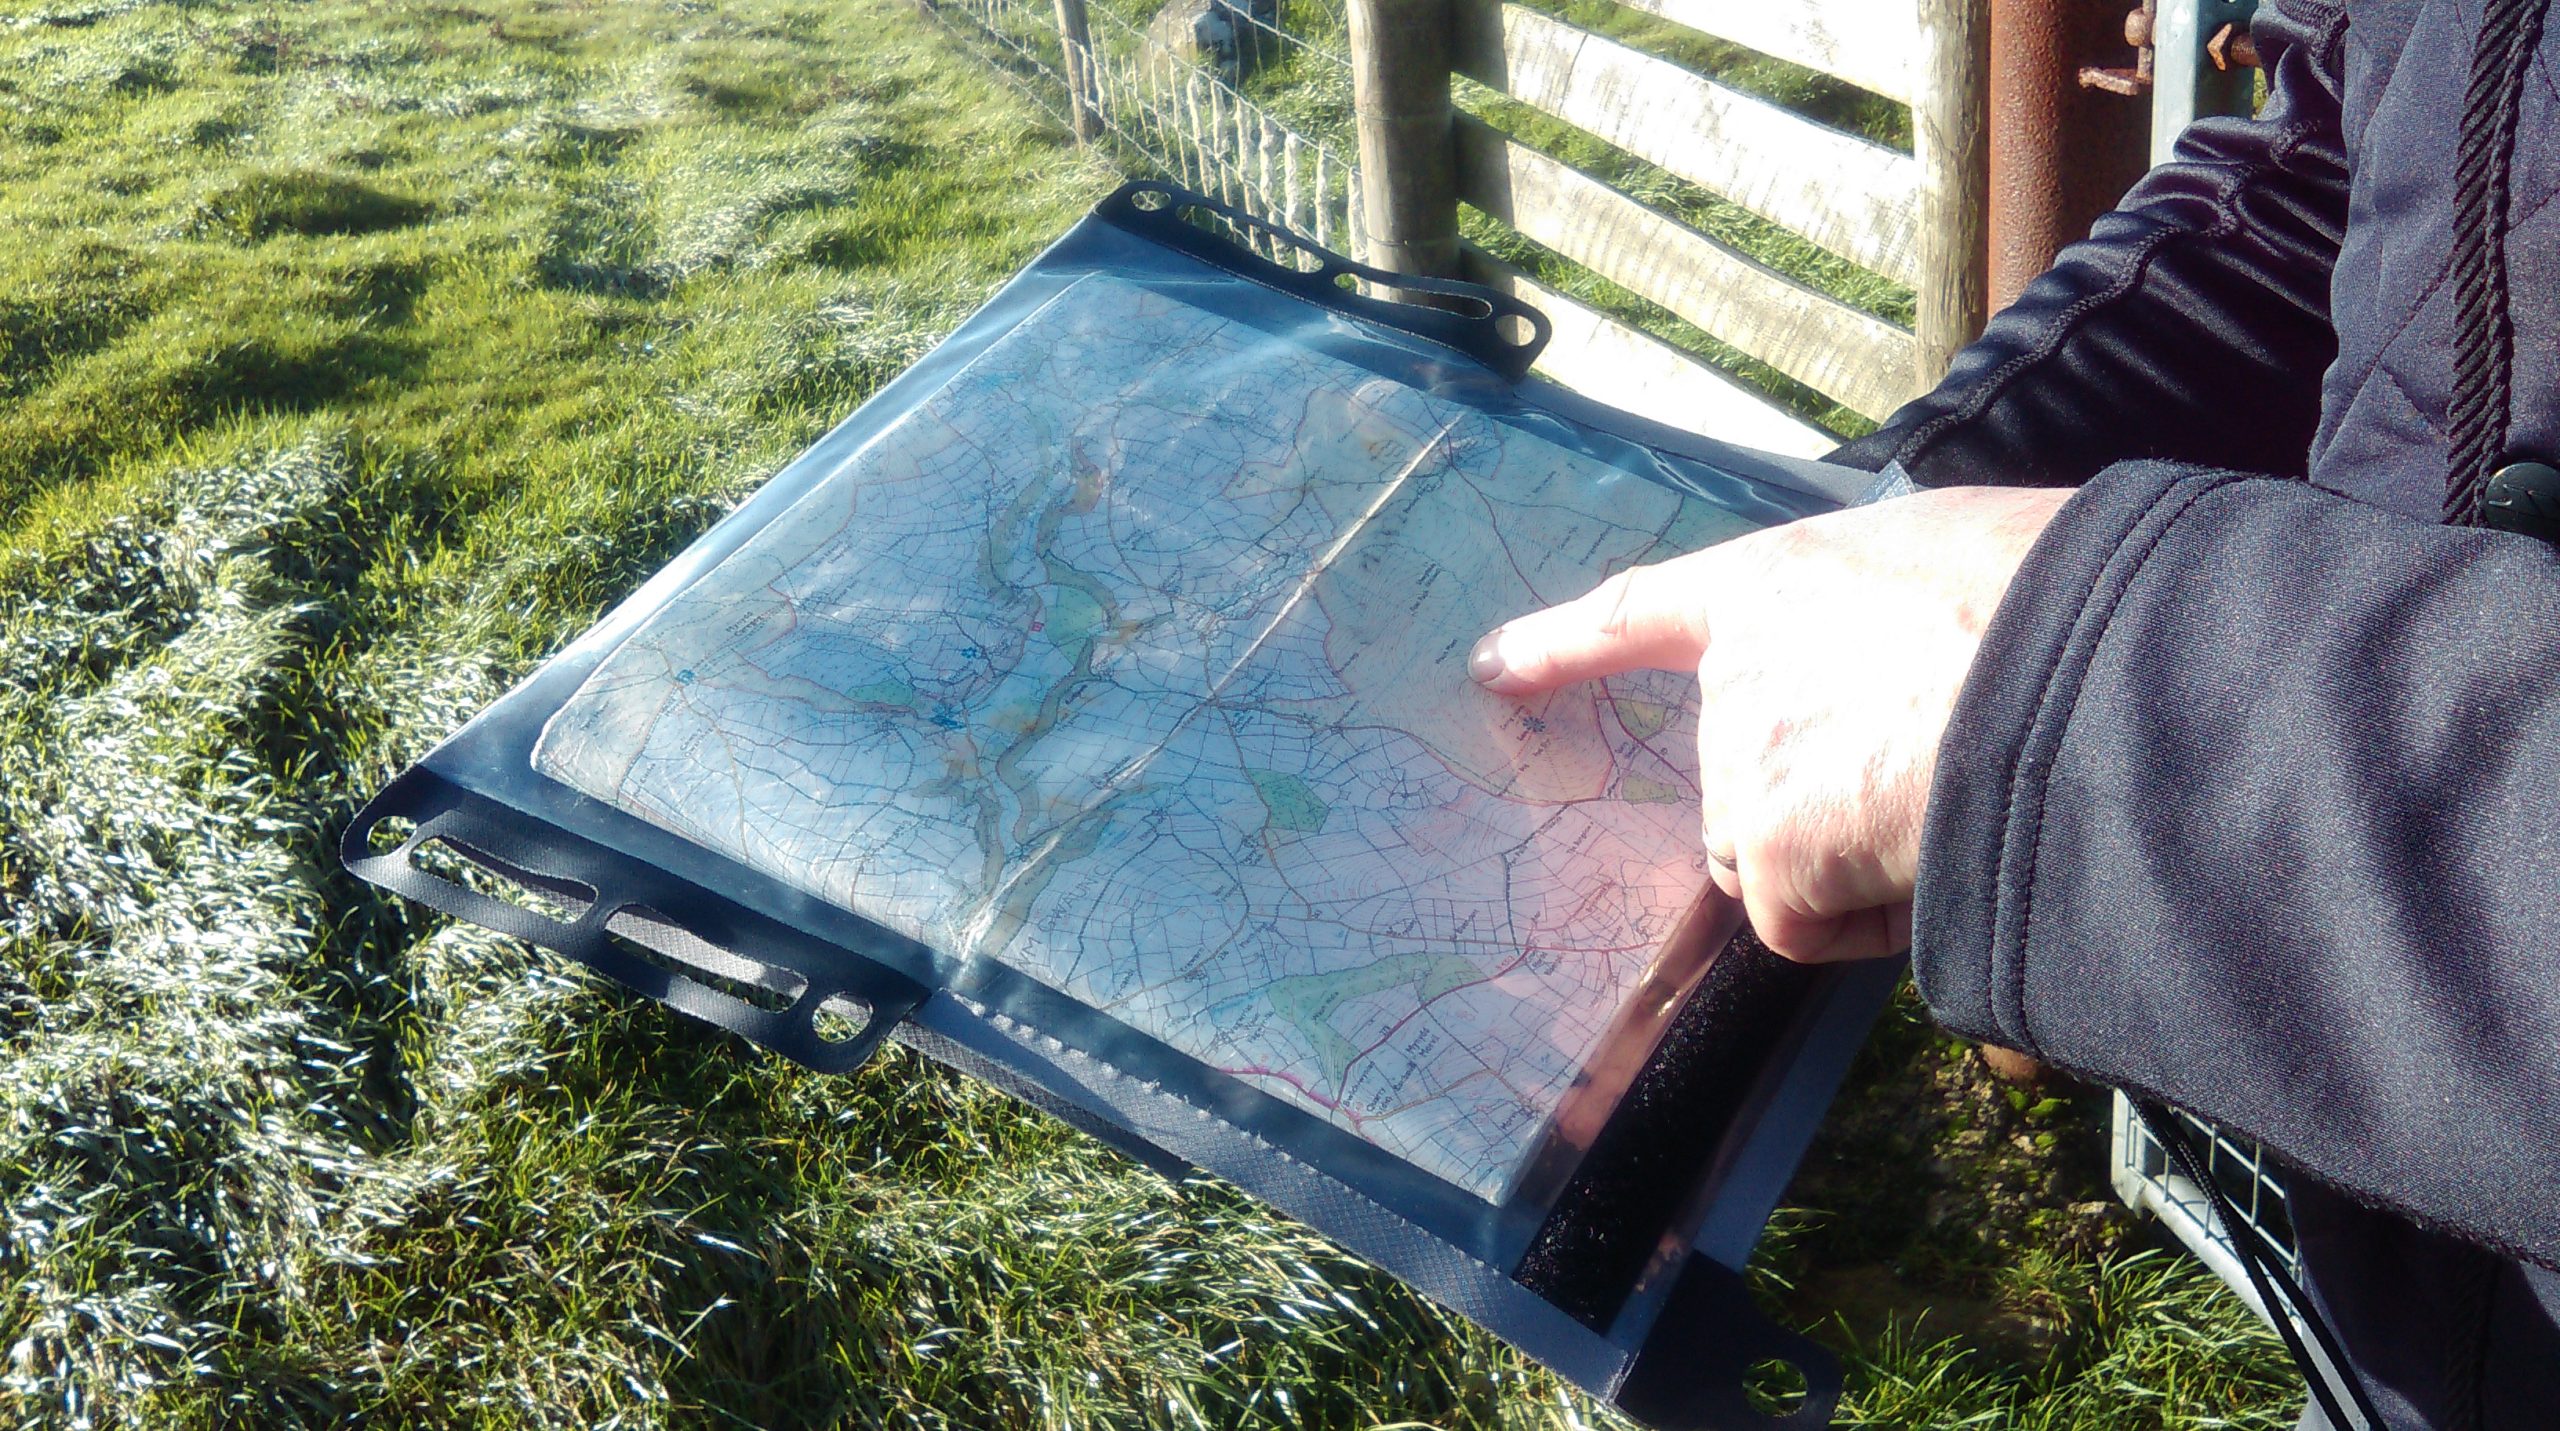
Folding Your Map – Before you start your walk, fold your map so that your entire route and a healthy chunk of margin is showing all around. And put it in a plastic map case. Even if the sun is shining it can double up as a useful seat during breaks and at lunchtime. Removing the cardboard cover of your OS map is a good idea and make new creases if you wish – the map is an essential tool – make it suit your purposes.
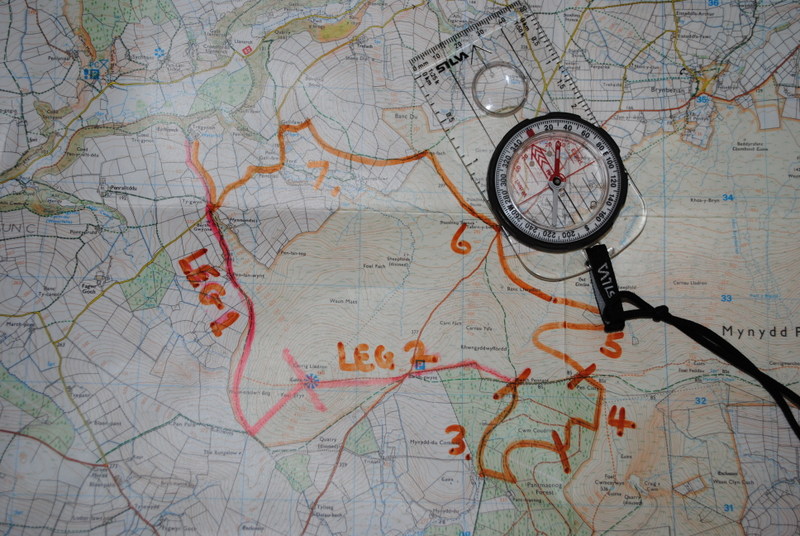
Think of Your Route as a Series of Bit-Sized ‘Legs’. – If you are not confident with a map there may be a tendency to stuff it in your rucksack, head for the top of the hill and then hope the right direction will magically appear before you. Instead plan your walk as a series of ‘legs’ and focus on each leg and the clues it contains when you get to it. It gives you and your group confidence if you announce something like: ‘This next leg is one kilometre long and from here it follows the river until we reach a small road which heads off to the right and after following the road up a gently hill we come to a church. We’ll stop there for a break. It should take us about 20 minutes.’ The announcement enables you all to know what to look for and how long to the break point and enables you and the group to identify if something is not quite as you expected. How many legs you create depends entirely upon how tricky the route is, how much you can remember at a time and how familiar you are with the route.

Orientate You Map – Have you ever looked at a public notice board with a map on it and had to stand on your head to be able to work out which way you need to walk? Frustrating isn’t it? The problem is that whoever put the notice board together did not orientate the map to the ground to make it easy to understanding. When you use your map make sure you rotate it so that the features on the map and the ground align with each other and suddenly it all becomes clear. Note the red needle is pointing to the top of the map (North) so the map is now orientated.
Pacing and Timing – Practise and perfect these techniques to ensure that you can estimate the distance you have moved over the ground. Pacing is literally counting your steps as you move along and knowing how many paces equate to 100m. It is really useful to know that if you expect to reach a feature in say 300m that you should be there after X paces. Timing is more appropriate if you are navigating over a long or relatively featureless leg such as rolling hills or a long path through the woods. You need to know how make kilometres you are travelling per hour – a gently stroll is about 2 – 3 km/hr. So after walking for 30 minutes you know you should be about 1km beyond your last check point. I have a small laminated pacing and timing card attached to my rucksack to make the calculations easier.
Know How to use Your Compass – Remember that a compass will not stop you from getting lost but it will help you work out where you are. On most hill and moorland walks you can probably navigate perfectly well using only your map and your eyes: on such occasions your compass need never leave your pocket. However, do ensure you are confident in using your compass so that if/when you do need it you can get something useful from it. A compass can provide you with the ‘bearing’ of a feature in the landscape; it can point your required direction of travel; and it can help you to orientate your map. In the picture below, ‘red is in the shed’ and so the compass is set for the next part of the walk.

Use Tick-Off Features – This is really simple but very important. When you have divided your route into legs, make a mental note of what features you should see along that leg. The map can tell you so much about what you should expect to see – and you simply tick them off in your mind as you pass them: the ground should start sloping to the right; I should see some woods over the next hill; there is a gully in the hill side to the left; there is a bridge over the river just below us; the path takes a sharp bend to the left etc etc. As you come across each expected feature in addition to ticking it off in your mind, give yourself a pat on the back – ‘I expected that to happen so I am confident that we are on track.’
Aiming Off – If you are looking for specific point, let’s say a style or a gate through a long fence line or a ford across a river, it is sometimes better to aim deliberately to one side of where you think it is rather than rely upon pinpoint navigational accuracy to walk straight up to it. If you try to hit it accurately, and it is not there, then you might be unsure as to whether you are to the left or right of it so you might waste time wandering up and down until you find it. If you deliberately aim-off then when you get to the fence or the river you know which way to turn to then find your feature. Aiming off is particularly useful in poor light or low visibility
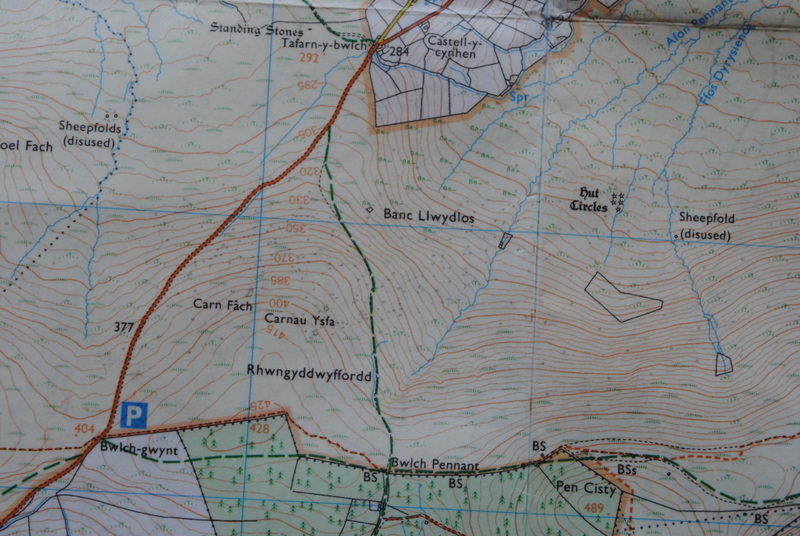
Use Linear Features– An old instructor of mine once told me about a student who navigated entirely by linear features. It worked for him so there is nothing wrong with it although on occasion it did add extra distance to his route! A linear feature is exactly that– it has length. A fence line, a river, the edge of a woodland, a road or track, a line of hills! – are all linear features. They should be easy enough to spot on your map and easy to follow on the ground. One word of warning, some linear features can move! A farmer might change his fence lines and the edge of managed woodland might be chopped down or otherwise reshaped. River or roads are less likely to move! Buying modern maps rather than cheaper old ones does have its advantages. Below you can see the road, the forest edge, streams and the enclosure are all great linear features.
Overshoot Features – If you are looking for something specific or undertaking a tricky bit of navigation, it is always sensible to have a warning sign that you have walked too far and have passed what you were looking for. This can happen, for example in a wood where some tracks may have been overgrown or otherwise obscured. For example, if I know that on this leg in 200m I am looking for a Right of Way entering the forest to my left (N.B. some Rights of Way are not clear on the ground), I will pace out 200m and if nothing is seen then I will carry on further. However, if I reach a bridle path also off to the left I know that I have gone too far and I need to retrace my steps and look again for the path. Obviously before retracing your steps work out how far back you need to go and pace it out. Without an overshoot warning you could walk on forever!
Know When to Call ‘Stop’! – If you are seeing features which you did not expect, or you are having difficulty relating the ground to the map and visa-versa, you may be ‘temporarily misplaced’. Be brave and call a halt while you re-locate yourself. Sit down and have a tea-break. Keep calm and recall in your mind, or better still include the group, what you did since the start of this leg or since the last point when you definitely knew where you were. The chances are you will soon see where you made a simple error – perhaps you turned left at the bridge rather than right because you were chatting at the time – it does happen! Once you know what you did wrong then you can retrace your steps (or modify the plan and carry on), no harm done. Do not compound the error pushing on, blindly hoping that you will miraculously re-find yourself on the hoof and no one will have noticed. It may also be a comfort to know that you can really only get lost in the true sense of the word if you are in the middle of a huge mountain range or a desert but if you are somewhere near Hound Tor on Dartmoor or Mam Tor in the Peak District but not sure exactly where, you are only temporarily misplaced!
Well that’s my top 10: hope they are useful for you. We talk about and practise all of these and many other hints and tips on the walking modules that I offer in the Preseli hills of Pembrokeshire. Enjoy.