In Part 1 I took you though the planning phase for a walk around the Marloes peninsula. In Part 2 we will look at some of the navigational challenges and considerations along the walk itself.
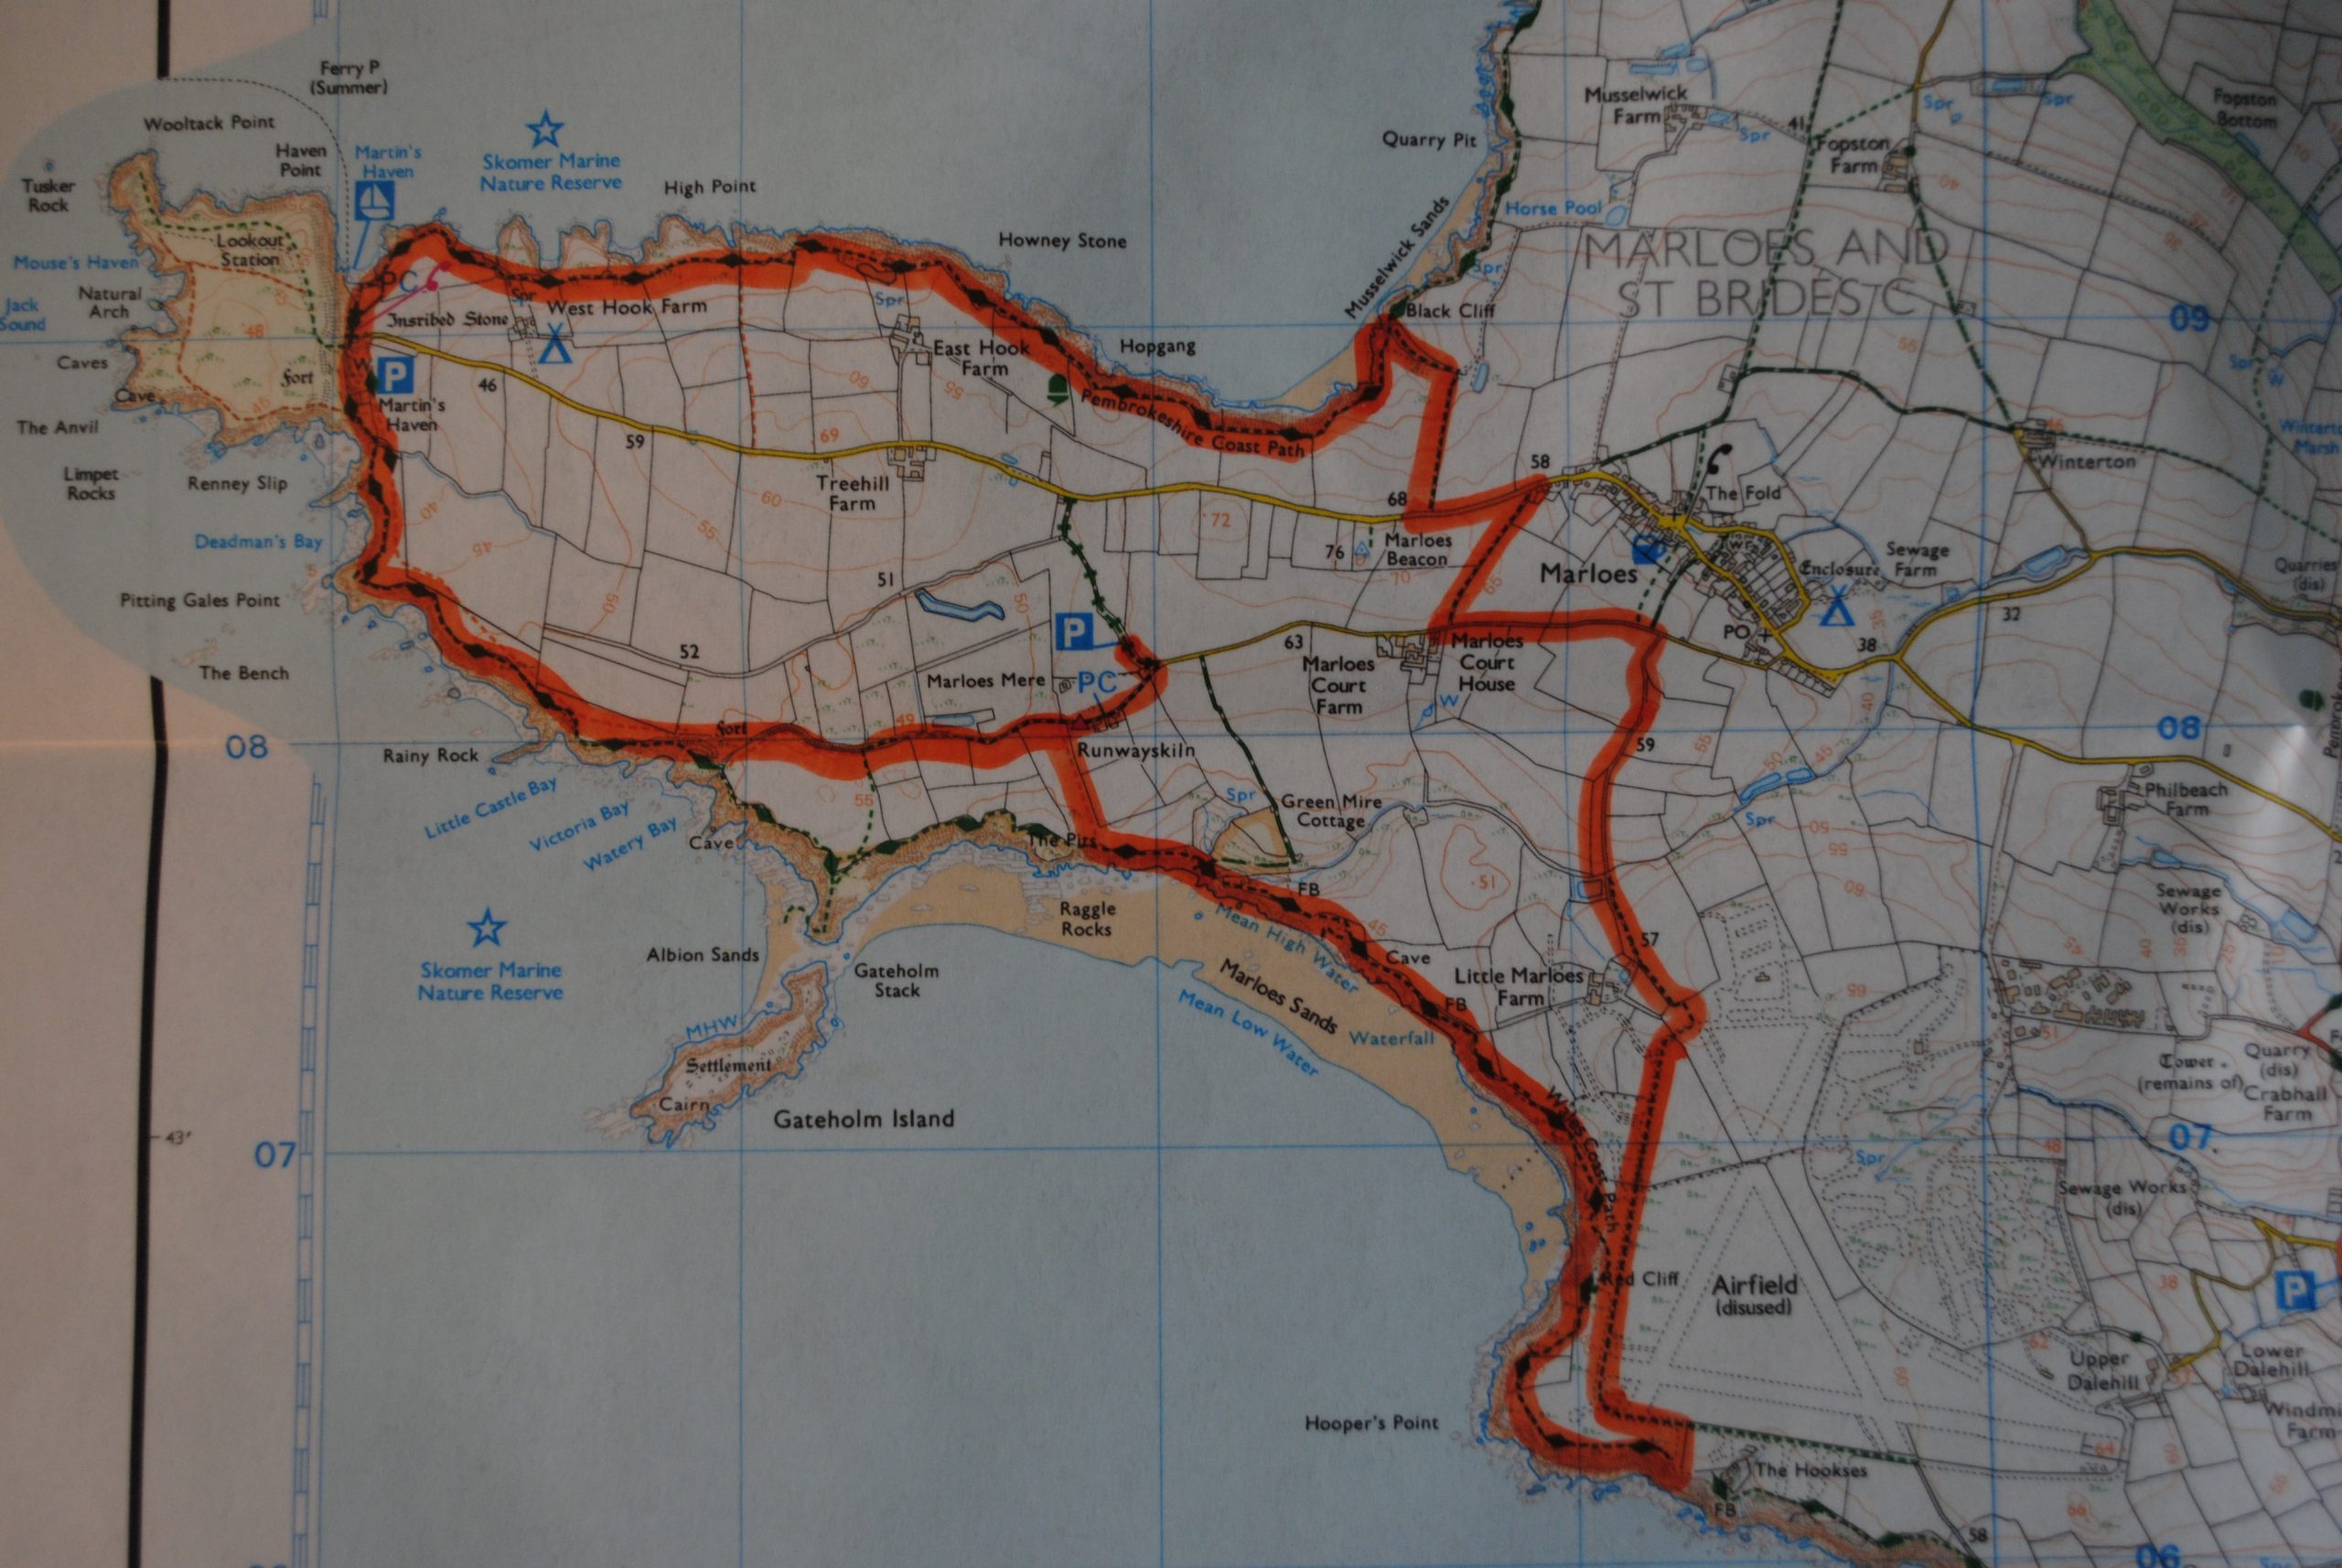
Having checked the weather forecast on the morning of the walk and confirmed that all was as we had expected, we set off for the Marloes as soon as my meeting had finished. We found the car park and after a friendly chat with a tourist who had been visiting and walking that area for years, we orientated the map and had a good look around just to ensure we had our bearings. It was 12:15 – 15 minutes behind what we had planned but that was no concern regarding daylight. The route we had chosen is shown below:
Our first ‘leg’ (every walk should be broken down into a number of discrete legs – each one relatively easy to navigate in one go) was to the youth hostel and the permissive path just beyond it. Finding the youth hostel was easy – out of the car park and turn right – and the permissive path we needed to pick up was 50 meters beyond that. As expected the path headed south to the coast. Having followed it to the beach, we could see the coastal path rising back up to the cliff tops heading eastwards and it wasn’t long before we found ourselves on our own, having left the small crowd of visitors on the beach enjoying themselves.
The first navigational challenge was to ensure that we did not walk too far along the coastal path and miss the point at which I wanted to turn inland to head North across the neck of the Marloes peninsula. I knew that the point I was looking for was 2.5km from where we joined the coastal path. Carol and I walk at about 3km per hour, so allowing a few additional minutes for walking uphill we could expect to be there in about 50 minute. To give me additional help, I also knew from looking at the map that we would have walked beyond Marloes Sands and, having turned South, we would be starting to turn to head East by the time we reached the ‘transit’ line which I was looking for. See below.
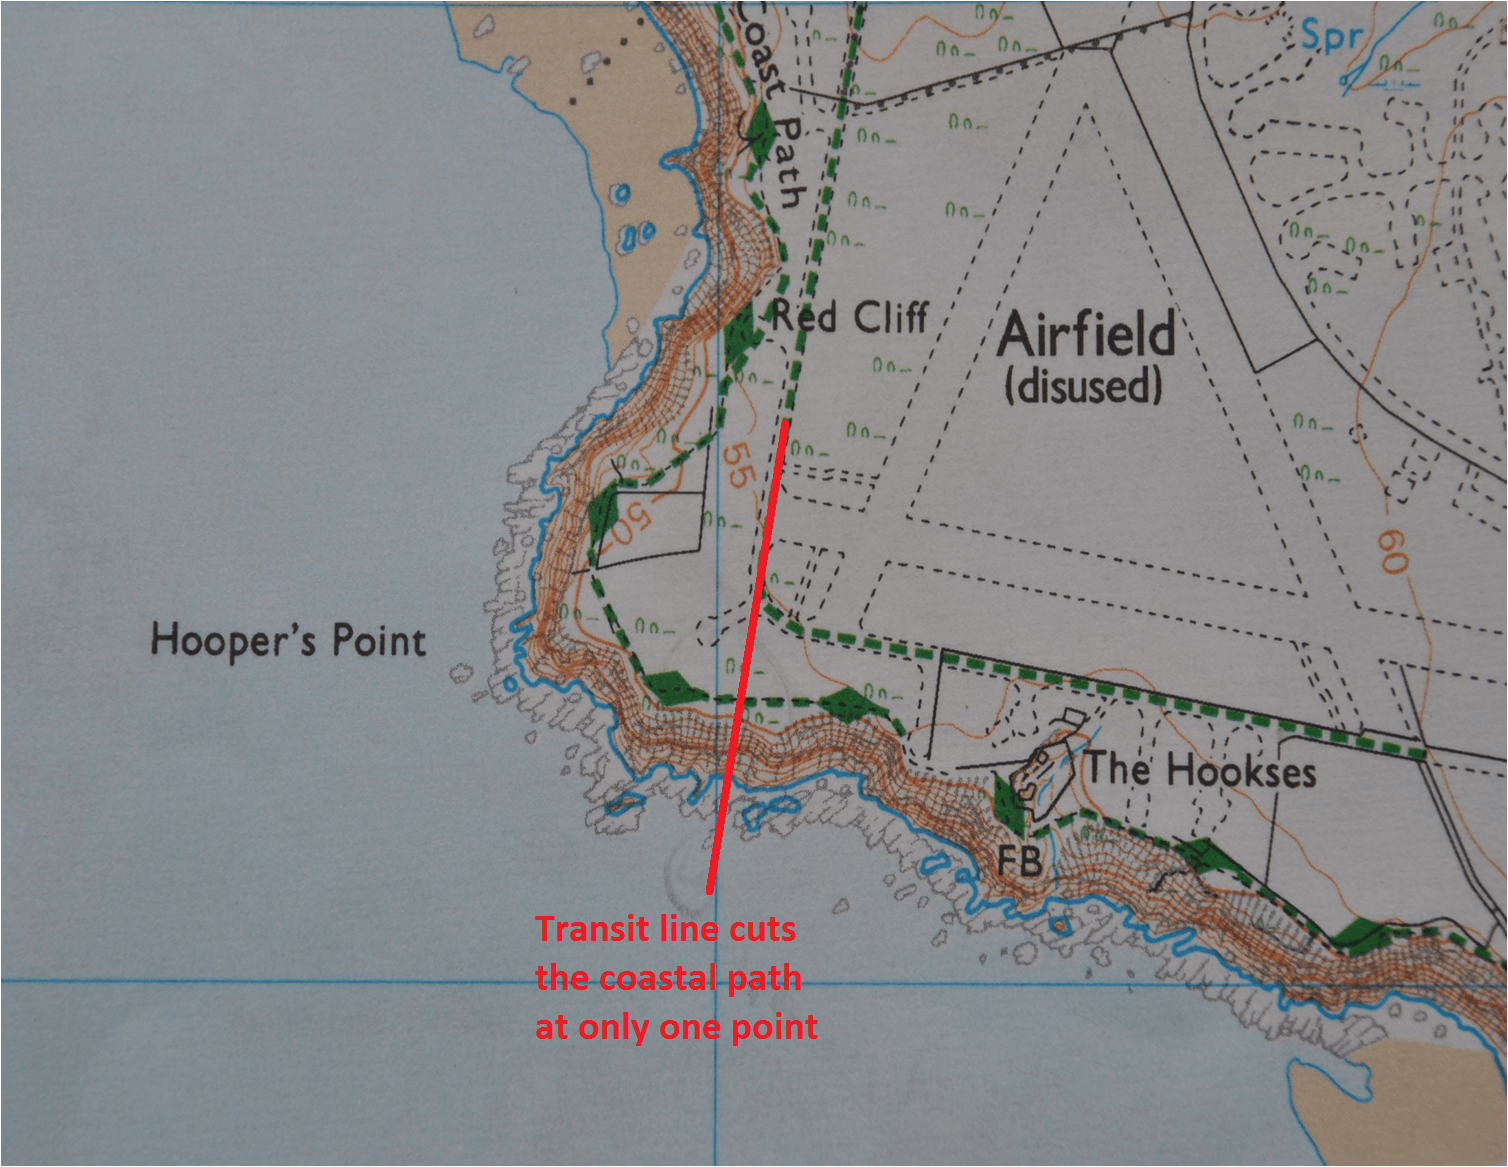
A transit line is usually a bearing from a distinct object which crosses a liner feature that you are walking along. In this case we were walking along the coast path (linear feature) and my ‘transit’ line was not a bearing, as such, but a great long aircraft taxiing strip on the old Coastal Command airfield , RAF Dale (more about that in Part 3). After 1 hour we were right there. I was not concerned that we took 10 minutes longer than expected because I had stopped a couple of times to take some photos and to admire the coastline. The taxi-way was heading off into the distance on a bearing of 010 degrees exactly as expected. Because there was only one point where the taxi way (if it was extended!) bisected the coastal path, everything fitted my expectation and so I knew exactly where we were on the map.
Walking Tip 16: Good navigation is about having confidence in knowing where you are. Use the big features on the ground to help you gain that confidence. Use a runway or a mountain rather that insist on looking for a tiny feature. In other words make life as easy as you can!
So with plenty of confidence we left the coastal path and headed North(ish) along the taxi way. We then needed, simple, to follow our noses for about 1.9km until we reached a metalled road just outside the village of Marloes. I could see a church spire up ahead and a quick look at the orientated map confirmed that there was a church in Marloes village so I also had a ‘headmark’ to head towards. This would provide additional confidence that we were heading in the right direction despite several small twists and turns along the leg. Timing-wise, on relatively flat ground we should make it in about 40 mins (unless I stopped again to take more photos – and why not?). This stretch of walk was relatively uneventful and we did reach the metalled road pretty much on time.
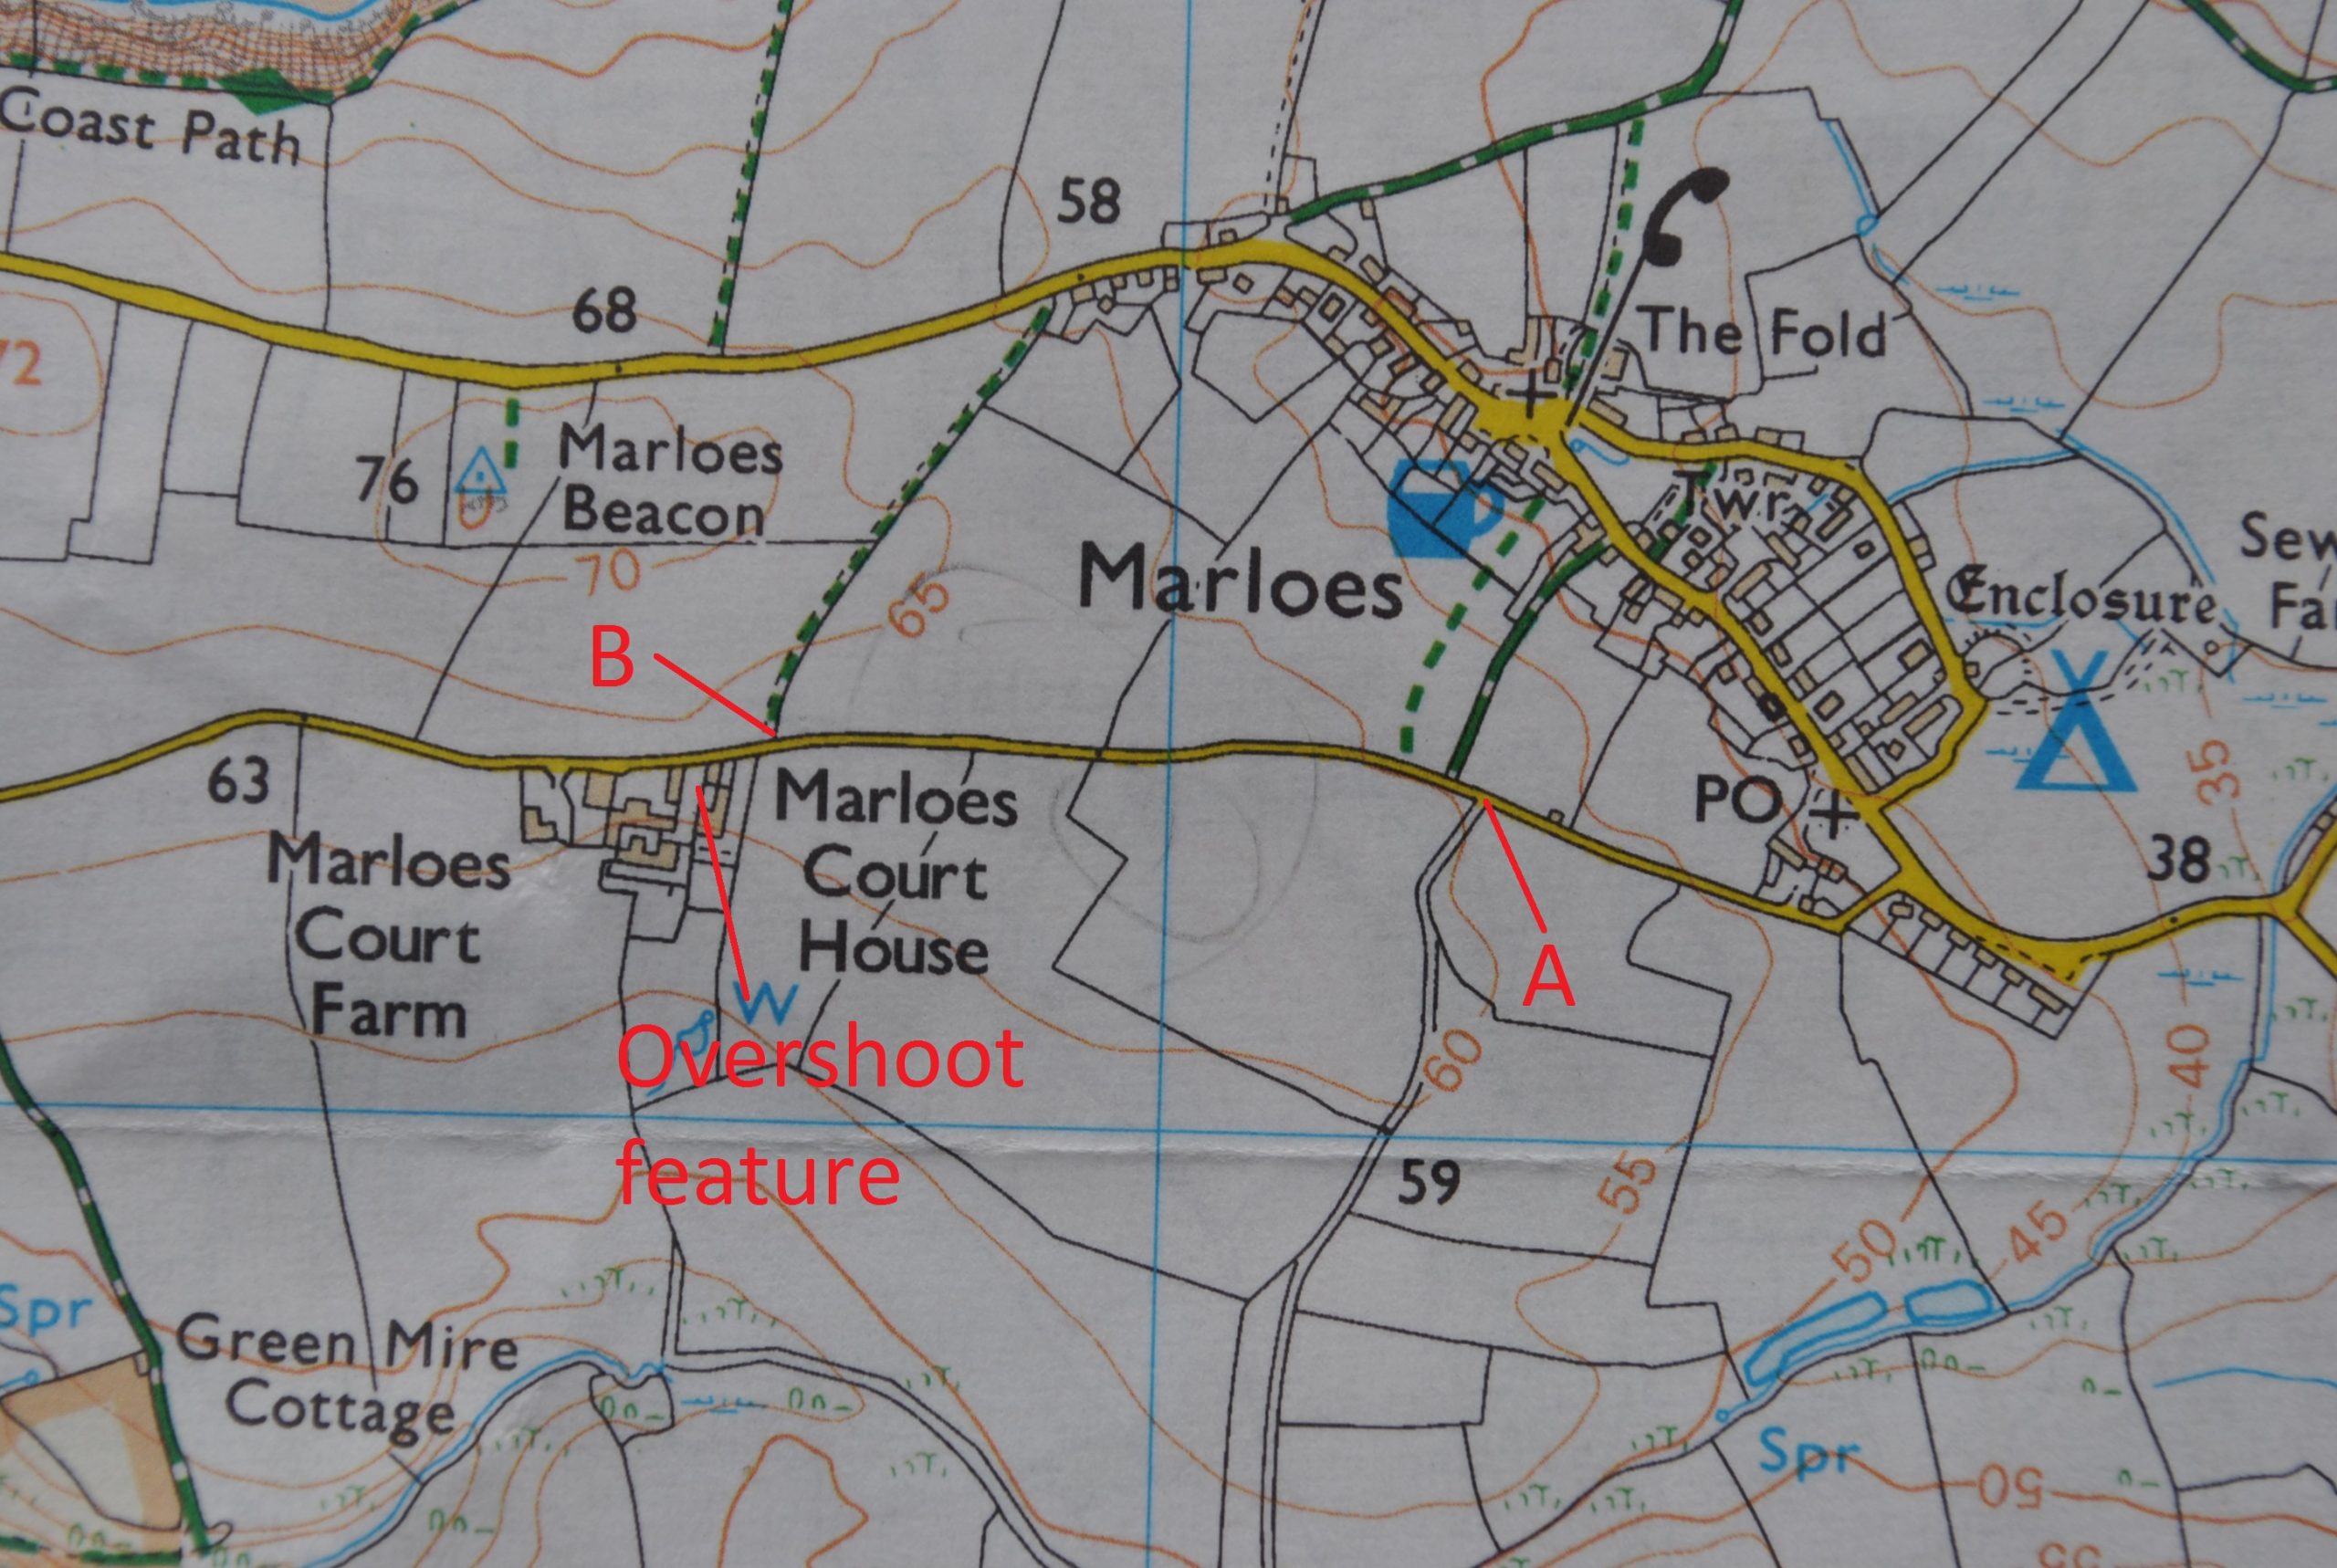
Now, the next ‘leg’ of the walk was along a narrow featureless lane with typically high Pembrokeshire banks so we couldn’t see very much. On the map below we joined the metalled road at ‘A’ and I needed to find a track off to the right (‘B’) and from the map I knew the track was 500 meters away. I could have paced that distance using my trusty ‘clicker’ or I could have used timing (10 mins at 3km/hr) but a look at the map also showed that Marloes Court House was only 20 meters beyond the track I was looking for and so I had a perfect ‘overshoot feature’ – if I found myself passing the Court House I would know that I had gone too far – or overshot! Simple. So off we went, watching out for cars on the narrow road and Marloes Court House on our left.
As we approached the Court House we saw the track to the right and a quick check of the name by the building confirmed that it was, indeed, Marloes Court House. Overkill, I know, but I checked the bearing of the path and it was heading in the right direction so off we went – confident, happy and on track – but getting a little hungry!
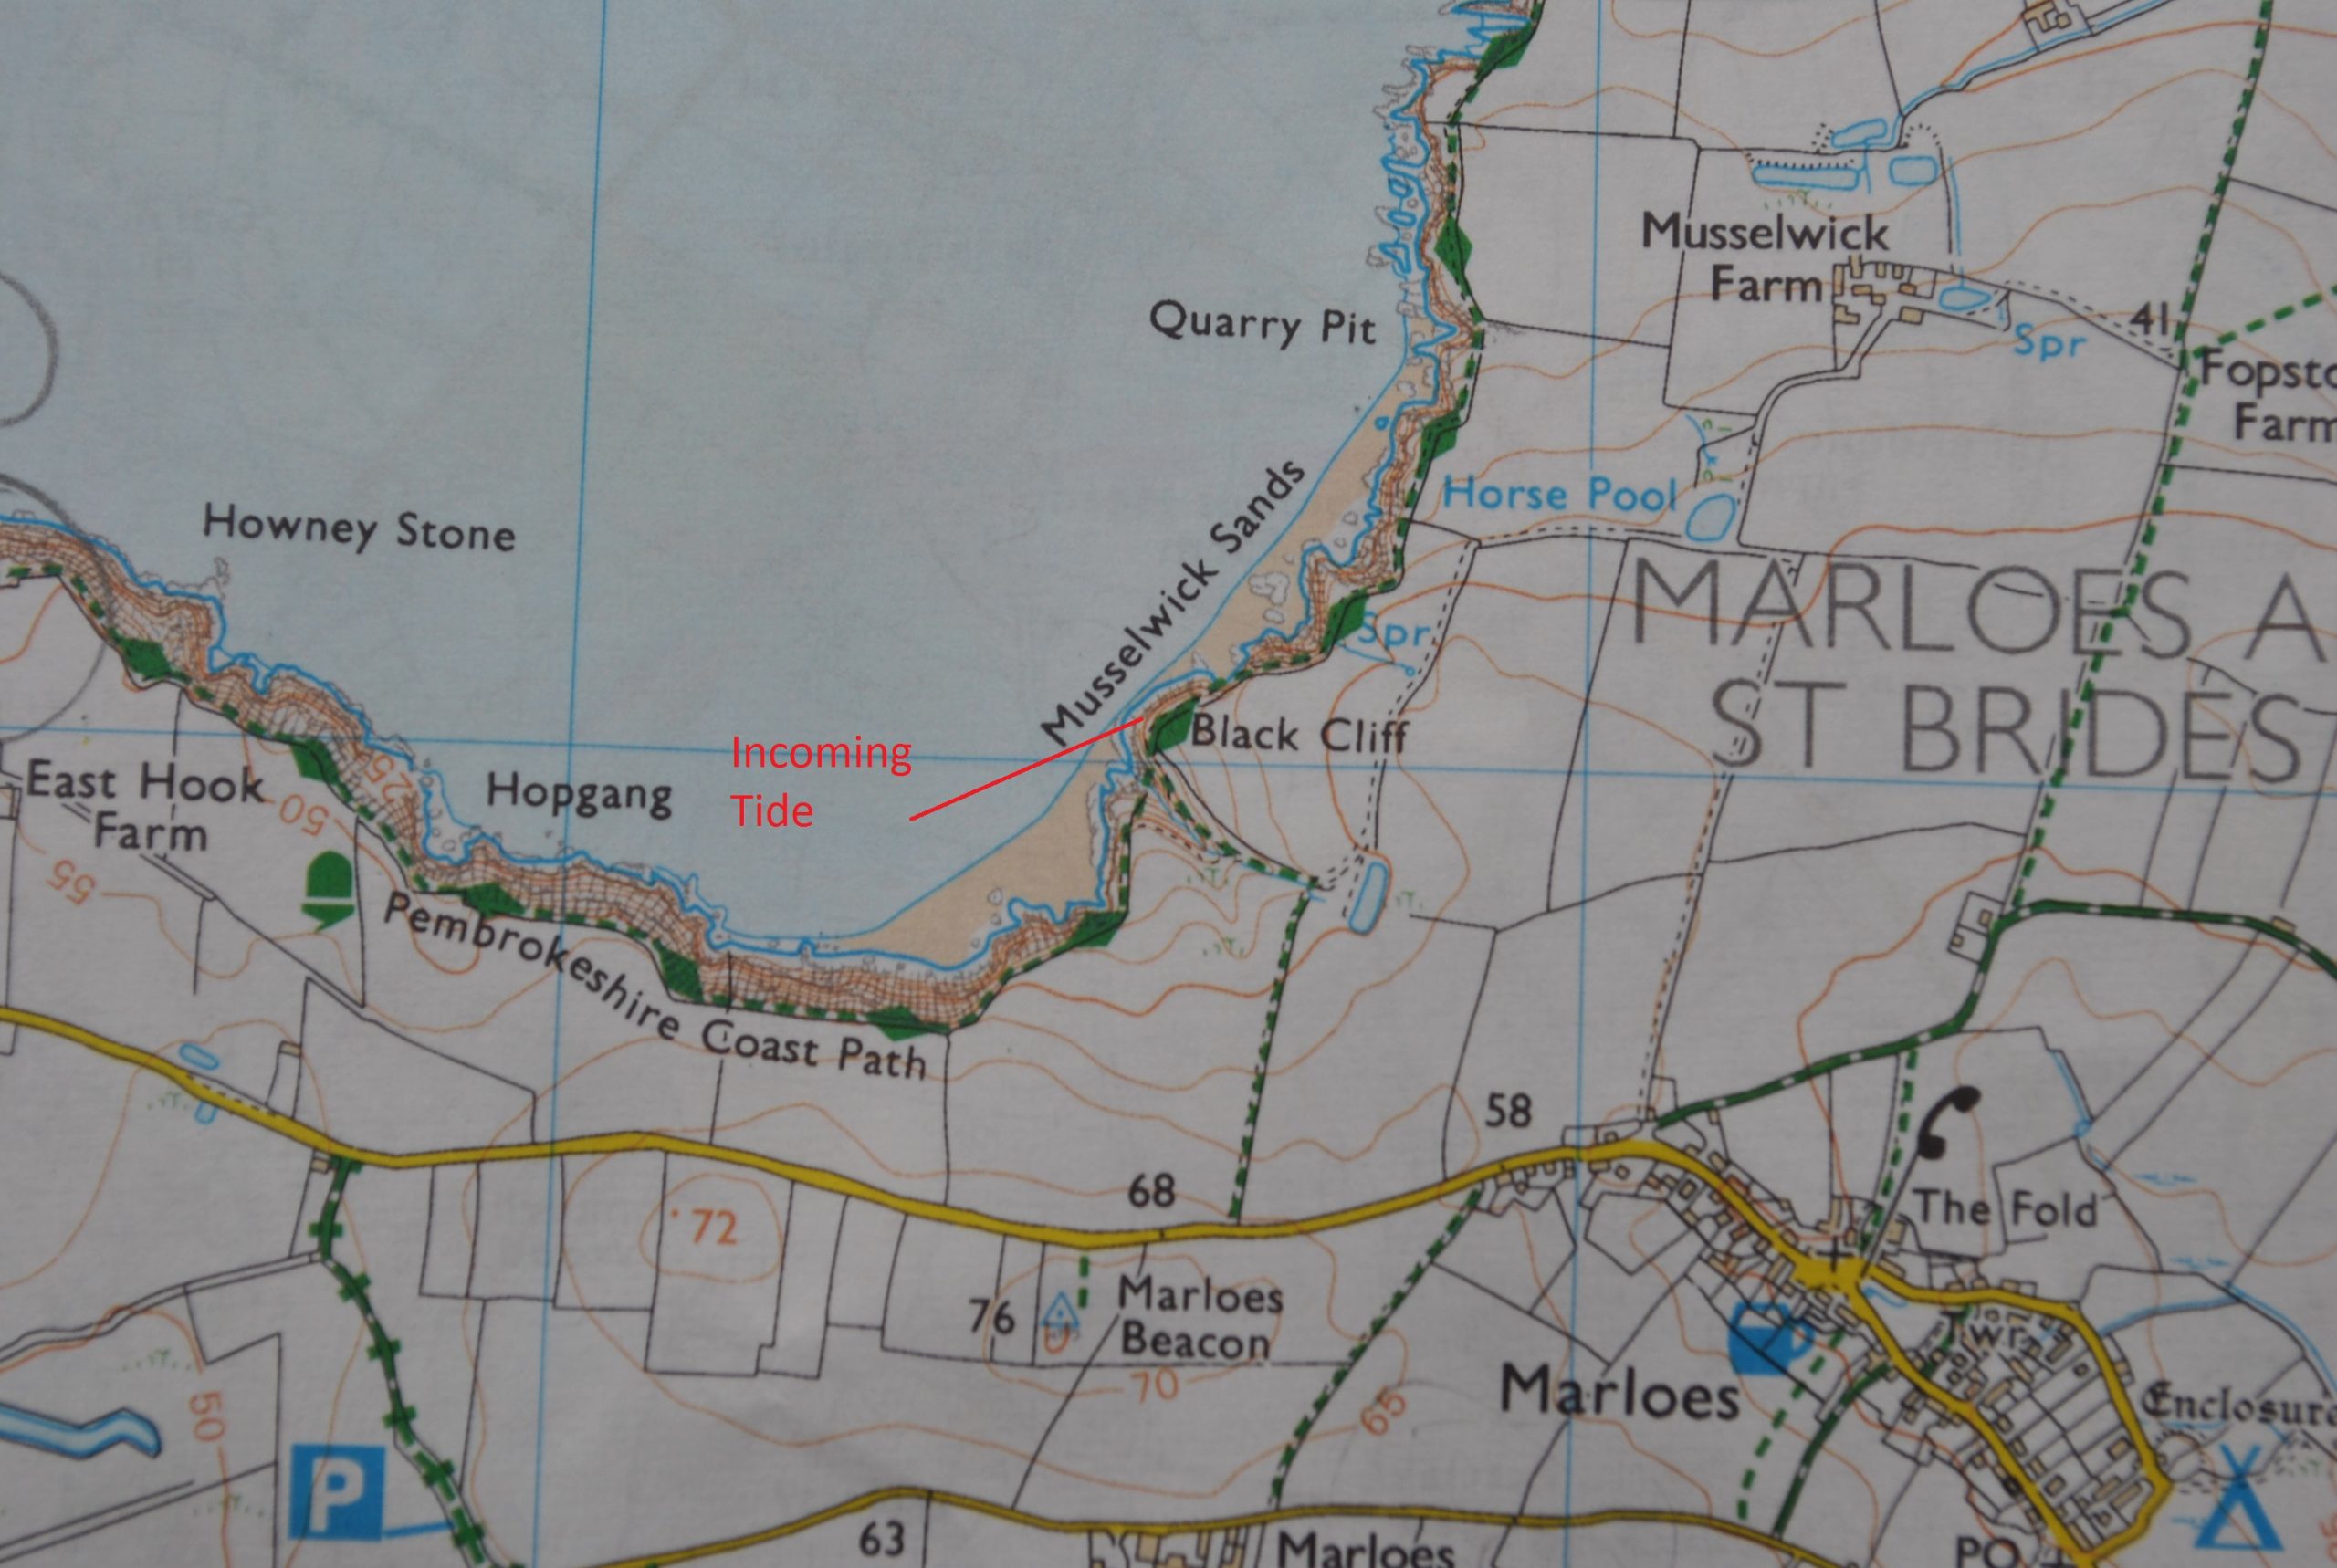
After another zigzag along a road and another track (and resisting the lure of the pub in Marloes itself!) we dropped down towards Musselwick Sands. We decided to eat right down by the waters edge and so my next consideration was not, strictly, navigational. I didn’t know whether the tide was coming in or going out but I did know that we had scrambled over rocks to get to a sheltered and secluded spot where we could have lunch and pretend that we were the only people in the world! My concern was that we did not become cut off by a rising tide, so I kept standing up and checking that our route back across the rocks to the coastal path was not submerging! Now I am not big-headed enough to think that I know everything so I acknowledge that I had missed something in the planning – if there is a chance of walking or spending time at sea level, know what the tides will be doing when you are there!
Walking Tip 17: Always think about the rise and fall of the tide if you are near the sea. Are you in danger of getting cut off? Know what the tide will be doing at the time you are there.
After lunch, and with still dry feet, we climbed back up onto the coastal path – the next leg was 1.6km long and was winding with plenty of dips and rises. As I explained in my blog Coastal Path Walking, dated 3 July 2015, navigating on the coastal path can be more difficult because of the large number of indistinct bays and headlands and the continuous ups and downs can soon leave you thinking you have made more progress than you really have. So ‘check-off lists’ are a good tool to use in this situation. 1.6km at 3km/hr would only take about 35 minutes but rather than worry too much about timing, I was looking for a pool/pond right next to the track and I knew that there was a distinct kink in the fence line 250 meters further on. The kink in the fence would also would act as my ‘overshoot’ if the pond was not obvious. See ‘A’ and ‘B’ below.
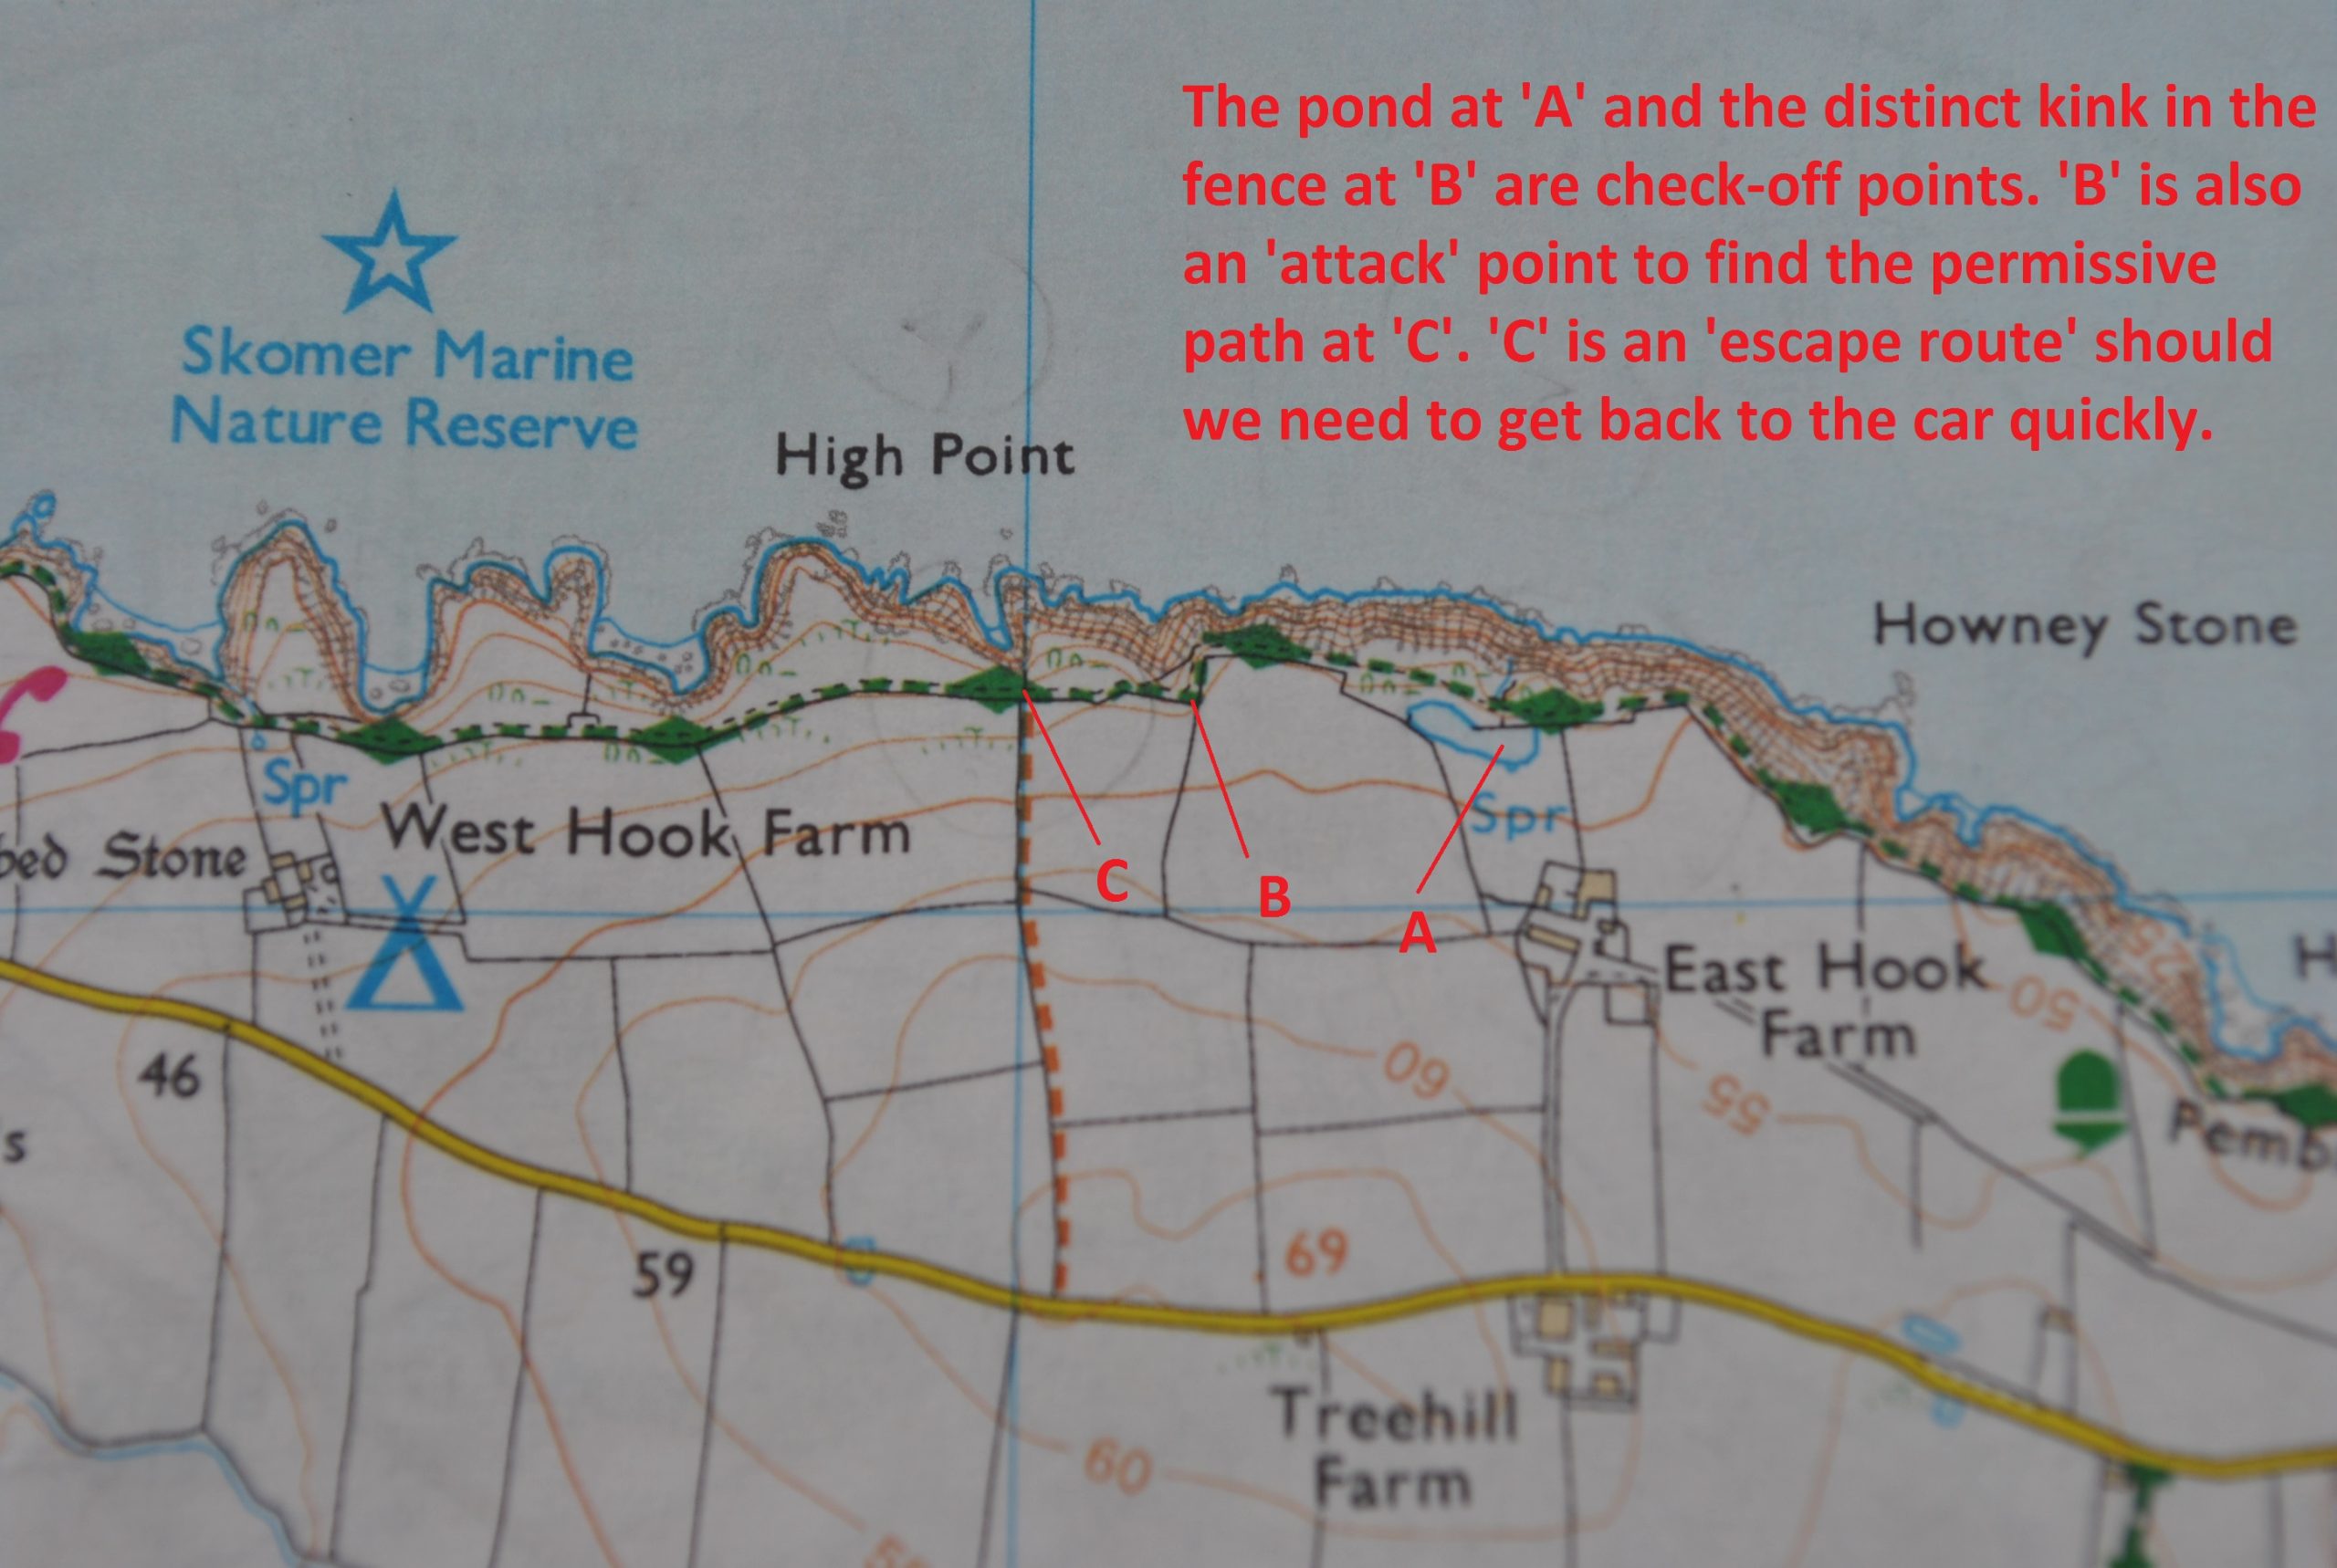
We found the pond easily enough although it took about 15 minutes longer. And I used pacing to get to the kink in the fence, no problem. Now the kink in the fence was not only a check-off point, it was also an ‘attack point'(- a distinct feature from which it is only a short distance to navigate to another point that you are looking for and which might not otherwise be easily found). If you look at the picture above it all makes sense. I used point ‘B’ as an attack point to ensure I found the permissive path at point ‘C’. And it was important that I did not miss the path.
Any walk should have ‘escape routes’: they are usually the closest point to enable you to get off the hill in any sort of emergency situation – e.g. bad weather, injury etc. I considered point ‘C’ to be an escape point in the loosest sense because it was the last opportunity to cut short the walk, should we have wanted to, before committing ourselves to the final long loop around Martin’s Haven. After quickly checking that we were both happy to continue along the planned track and that we were very much on schedule, we decided to continue. But the point is, it was worth checking just in case.
Walking Tip 18: navigational tools and techniques, if fully understood, can be used in a variety of ways and adapted to provide best support to the walker.
Beyond point ‘C’ we soon passed the campsite marked on the map and then reached Martin’s Haven. We missed out Deer Park, as planned, having been there before and continued around the headland, gradually turning to head South West back towards Marloes Sands. One final distinct feature to look for was the Fort because at that point I wanted to leave the coastal path for the last time and head back towards the youth hostel and the car park. See below. From experience we knew that the fort would either be a bank-and-ditch or some form of ruined walling and in the otherwise quite flat terrain we knew it should be quite easy to spot.
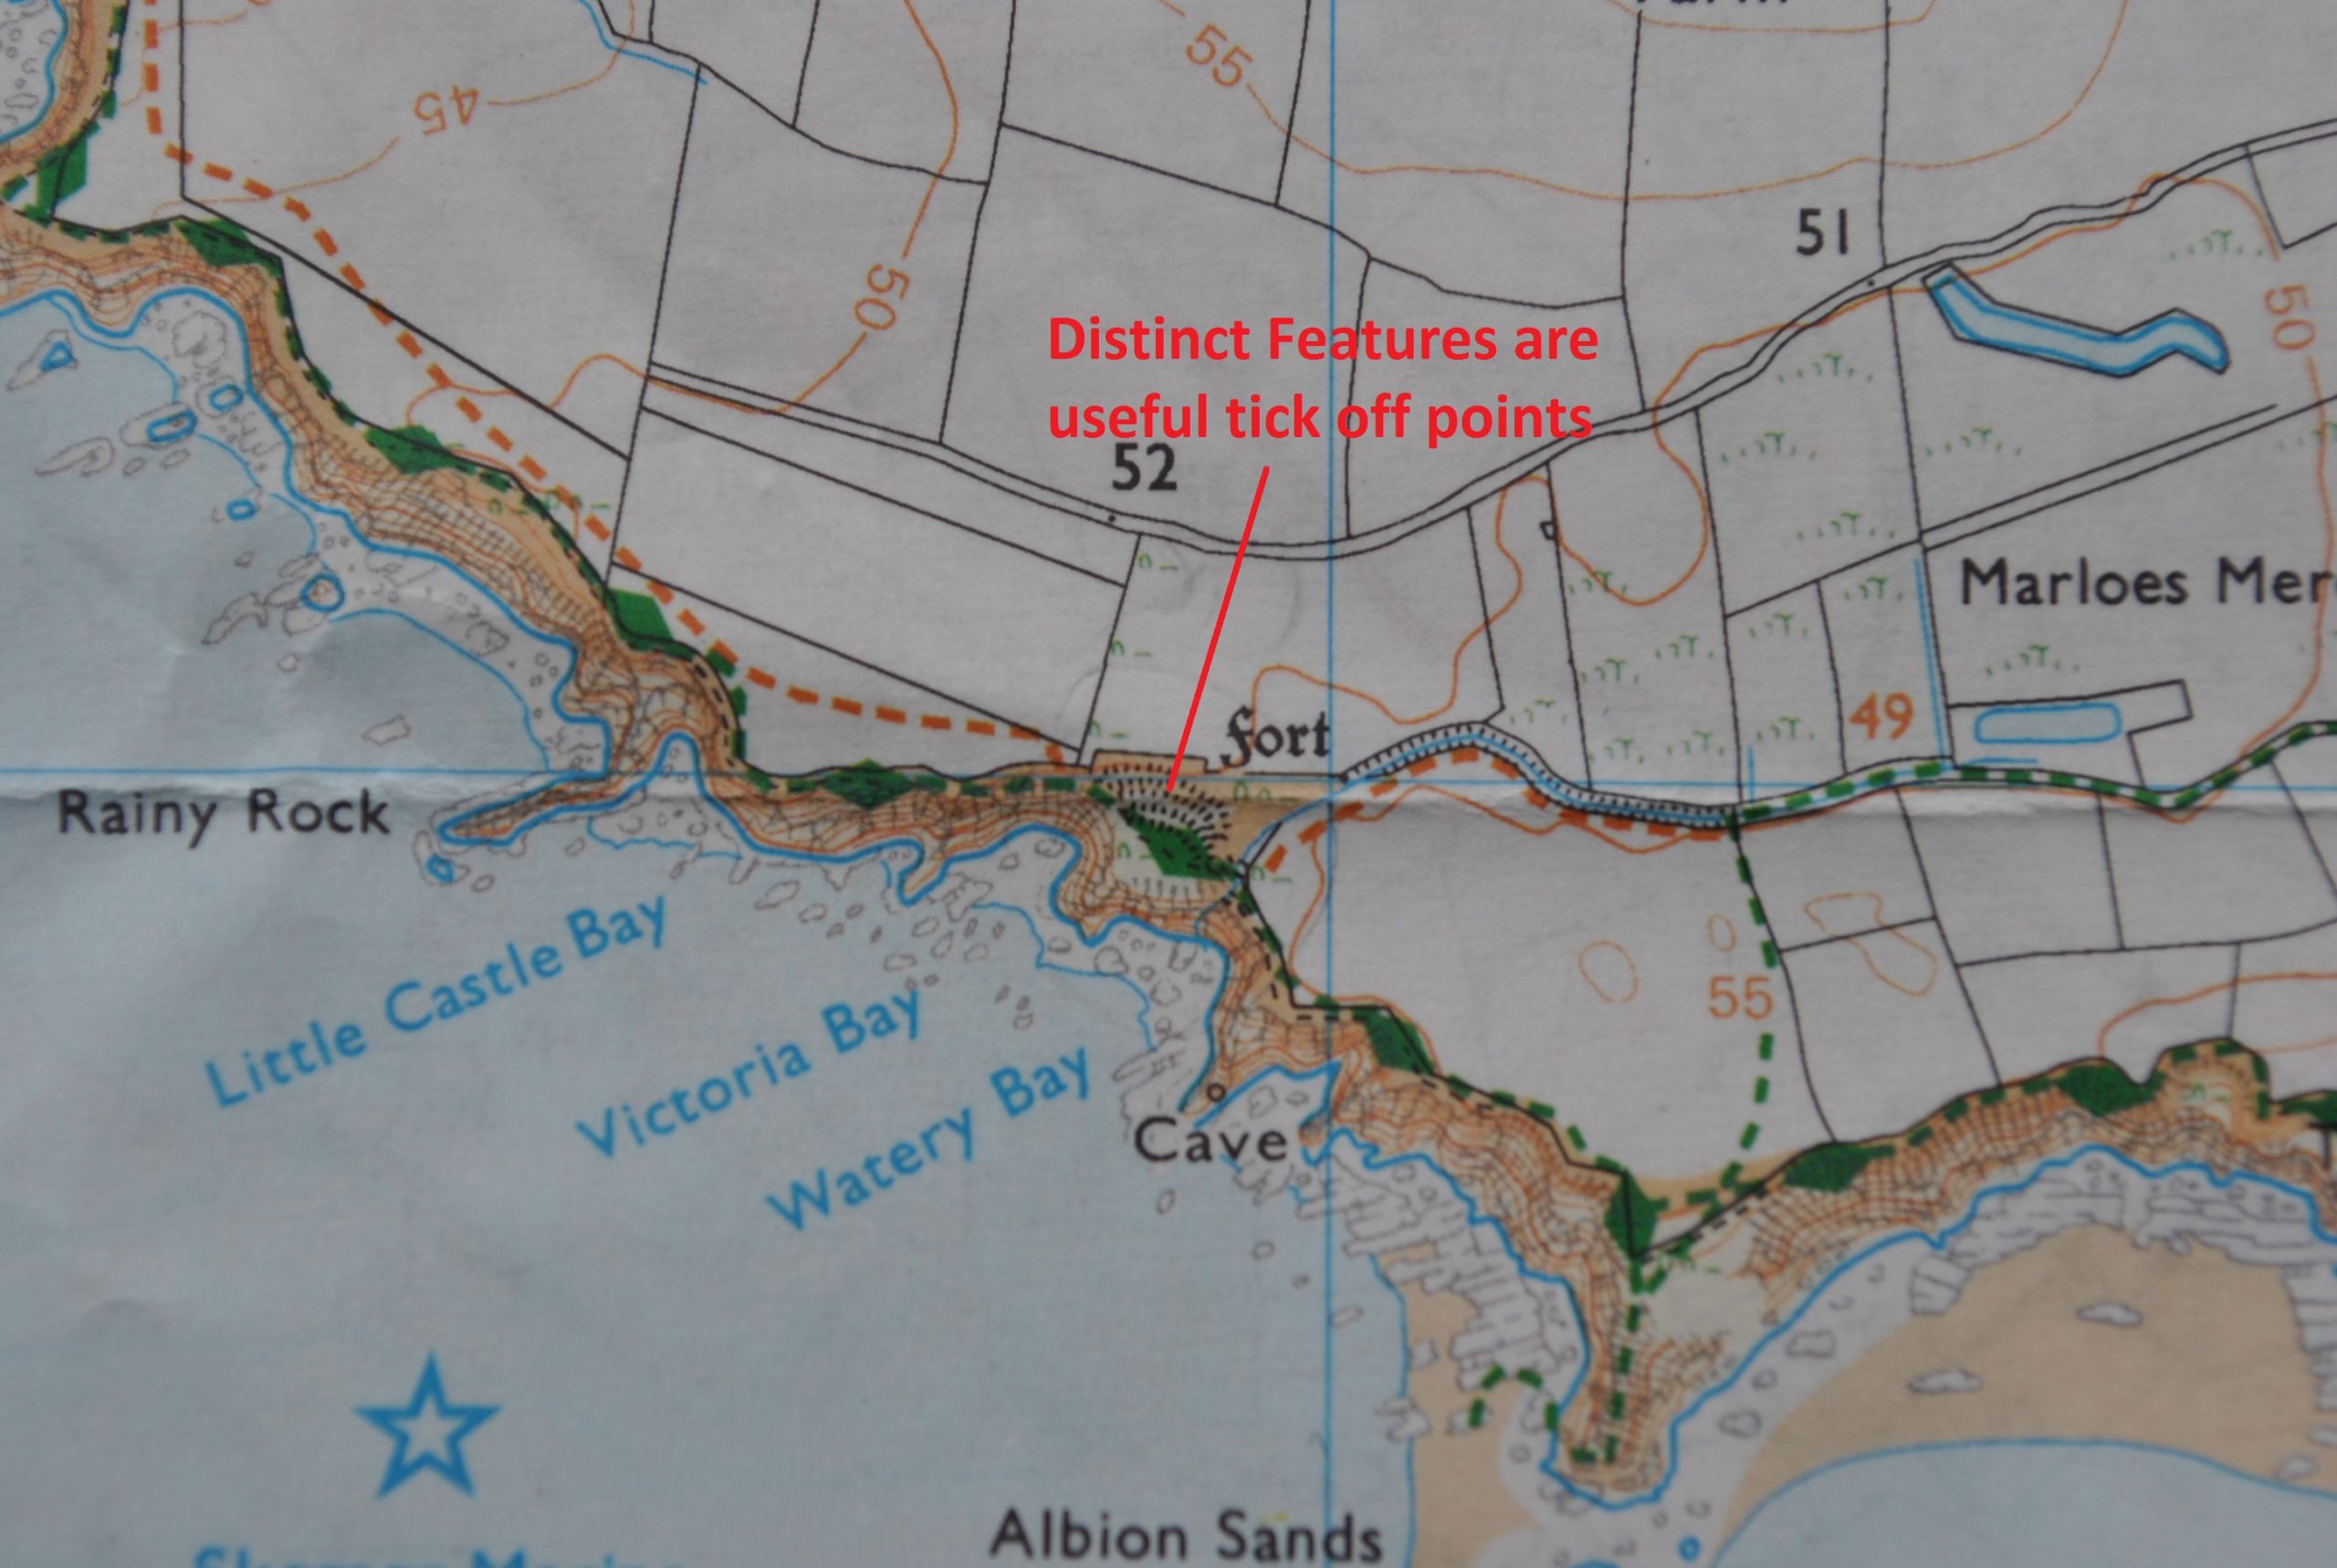
That said, I was looking in the field on the other side of the track and wondering where it was, when Carol suggested I turned round and had a look behind me! Ok, so I nearly missed the huge bank-and-ditch!
Up ahead we could see the youth hostel and a few parked cars and when the ice-cream van came into view it was a welcome bonus!
It’s always a good feeling to reach into your pocket at the end of a successful walk and find your car keys and so I did on this occasion – another great day happily concluded in Pembrokeshire. The pub beckoned.
In the planning phase and using Naismith to calculate the duration of the walk, we had estimated 7 hours which included a very leisurely lunch, shorter breaks and plenty of photo and viewing stops (I took about 55 photos!). The walk actually took us 6hrs 30mins. Not bad at all!
Walking Tip 19: do your planning thoroughly and trust Naismith’s rules.
Those of you who have read earlier blogs will know that I am really keen on encouraging walkers to look around, enjoy the views and remember why they are walking in the first place. In Part 3 I will show you some of the great views we enjoyed on this walk: i.e. why we went on the walk in the first place!!